Your One-Stop Reference for TilesWM

From onboarding basics to advanced debug techniques, every topic is presented with brief, actionable text paired with clear visuals. Find the answer you need without wading through unnecessary fluff.

Onboarding

Welcome home

From the moment you launch TilesWM, a guided journey takes you from first steps to perfectly organized windows. Every permission, every setting—explained clearly and granted effortlessly.
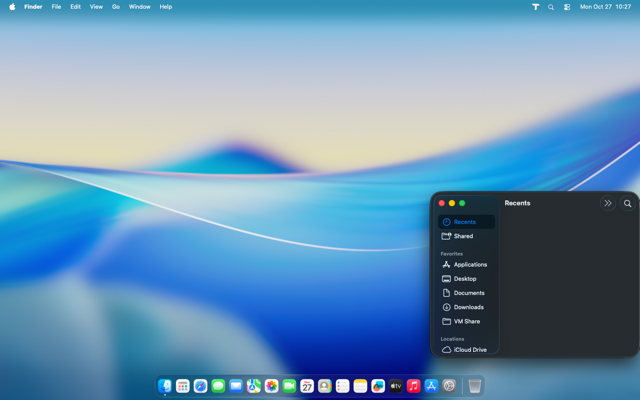
0.1 Prerequisites

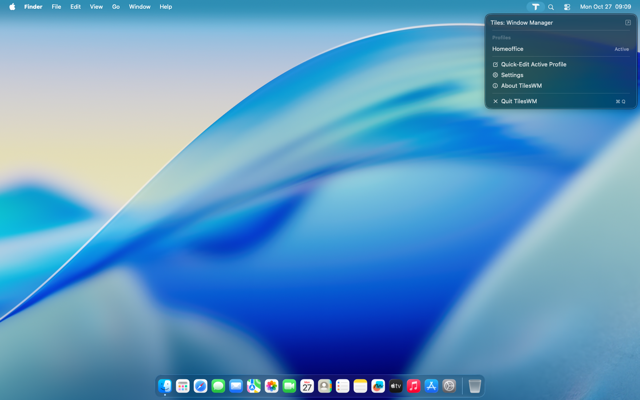
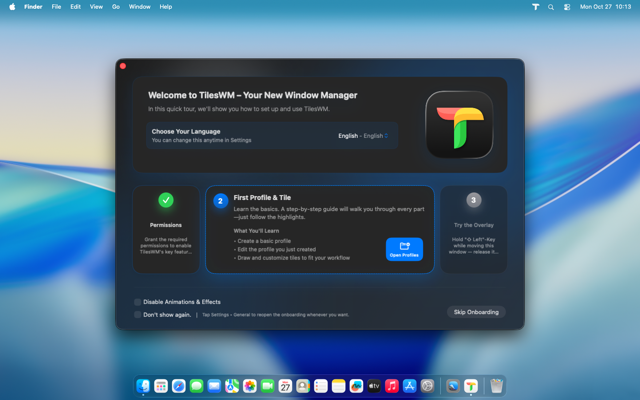
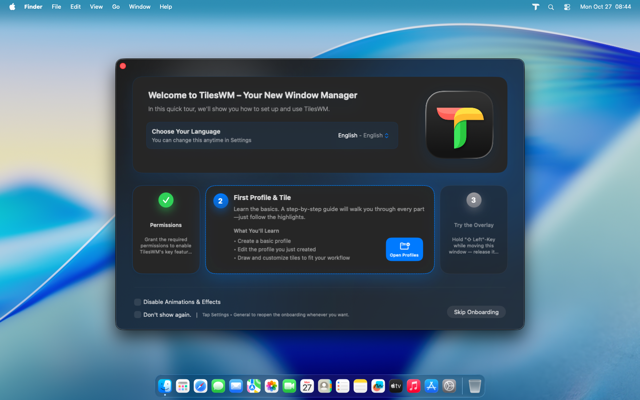
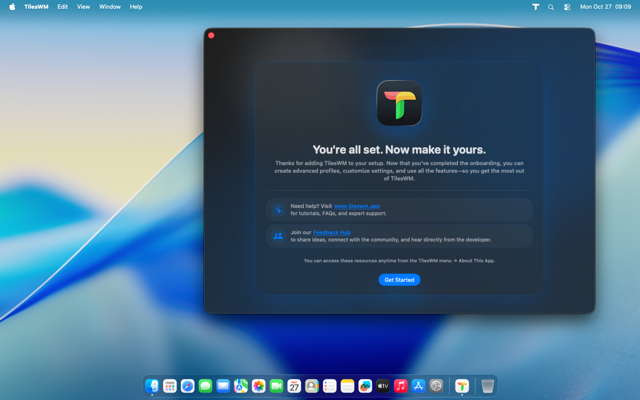
The things you see when launching TilesWM the first time

TilesWM welcome screen at first launch
Launch and follow the onboarding

Open TilesWM and follow the setup guide to enable window management.
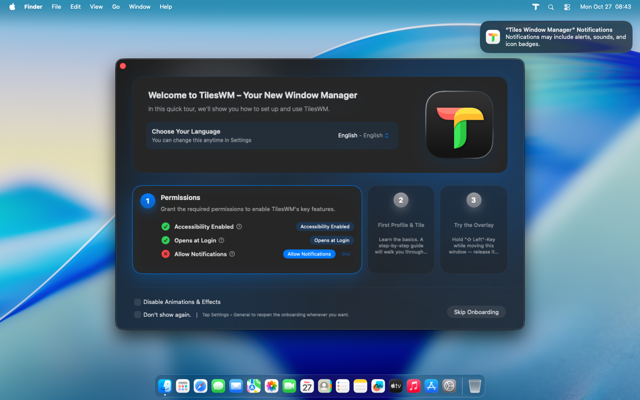
>

First things first

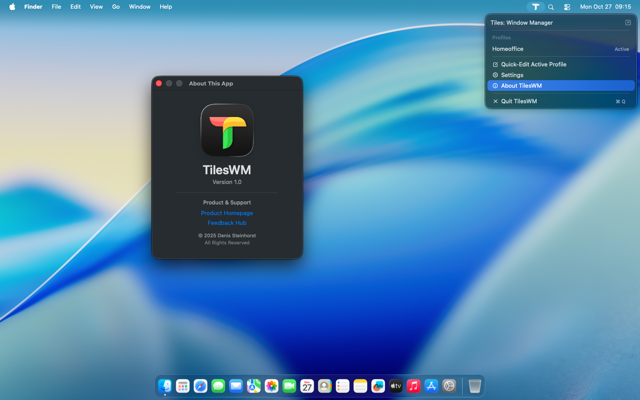
Launch TilesWM for the first time. The welcome screen greets you with a clean, focused interface that sets the tone for everything ahead.

Adjust everything to your needs, enjoy TilesWM.
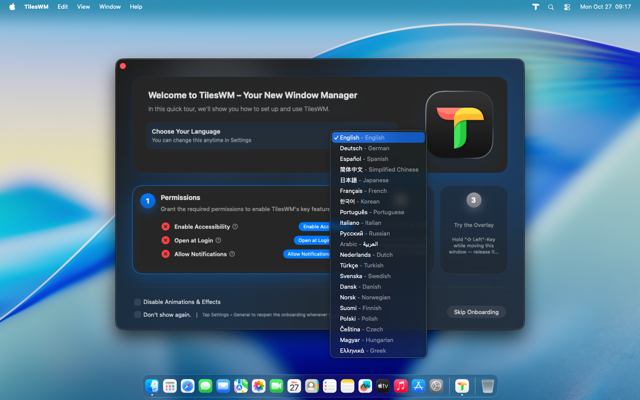
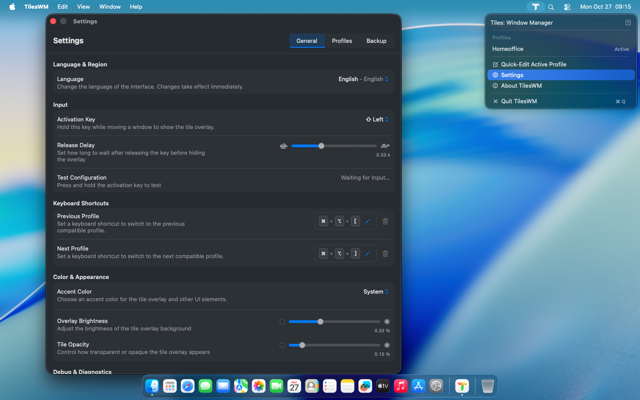
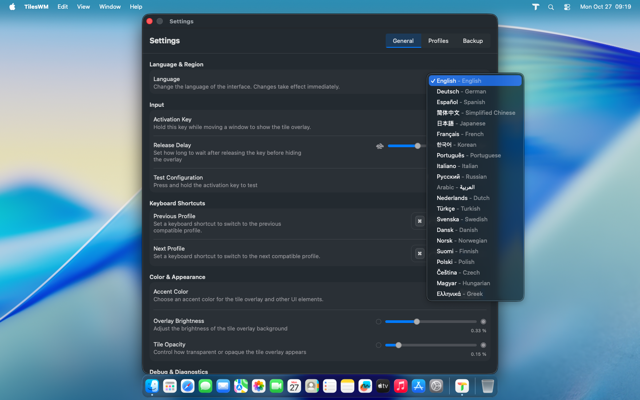
Language selection dialog
Step 2

Speak your language

If TilesWM couldn't detect your preferred language, choose the one you're most comfortable with. Every word matters.

0.2 Accessibility Permissions

Grant TilesWM the power to control window positions and respond to hotkeys

System prompt requesting accessibility access
Step 1

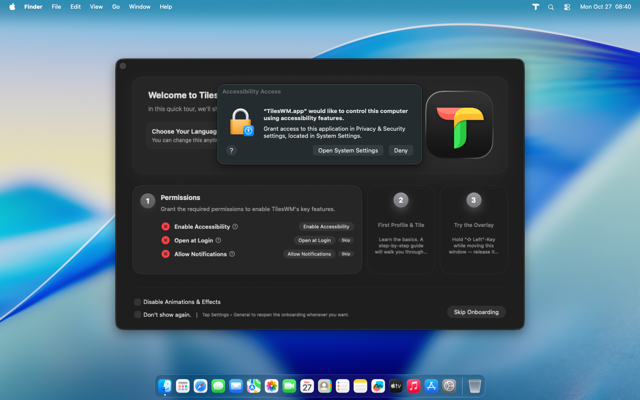
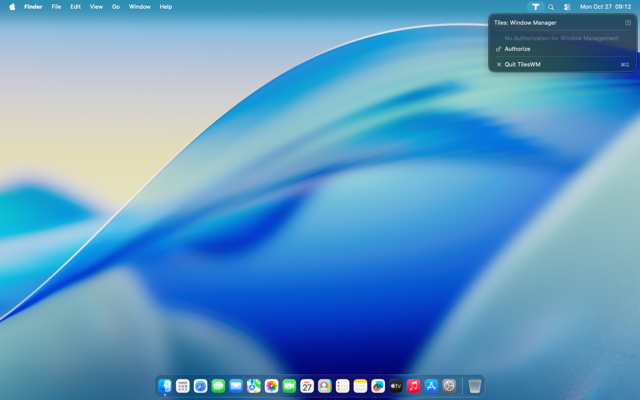
Grant the power to control

To manage window positions, sizes, and respond to hotkeys, TilesWM needs Accessibility permissions. Click "Enable Accessibility," then choose "Open System Settings" in the prompt.
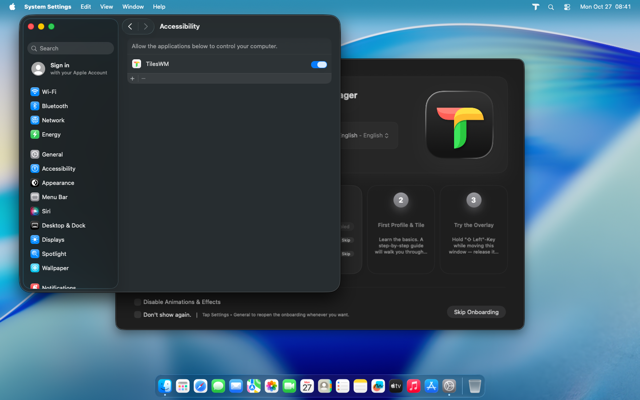
System Settings showing TilesWM in Accessibility list
Step 2

Activate the toggle

You'll find TilesWM waiting in the Accessibility list. Turn it on. Simple as that.

Password prompt for system changes
Step 3

Authenticate with Touch ID

Your Mac wants to make sure it's really you. Use Touch ID or enter your password to confirm the change.

Accessibility permission successfully granted
Step 4

All set

The toggle indicator is now active. TilesWM is now fully authorized to manage your windows with precision.

0.3 Autostart (Optional but Recommended)

Have TilesWM ready every time you sign in
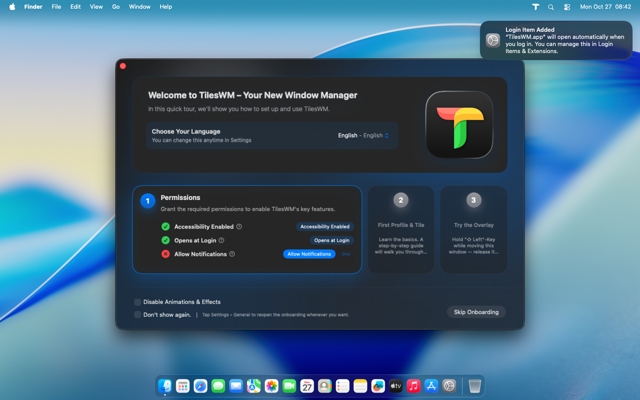
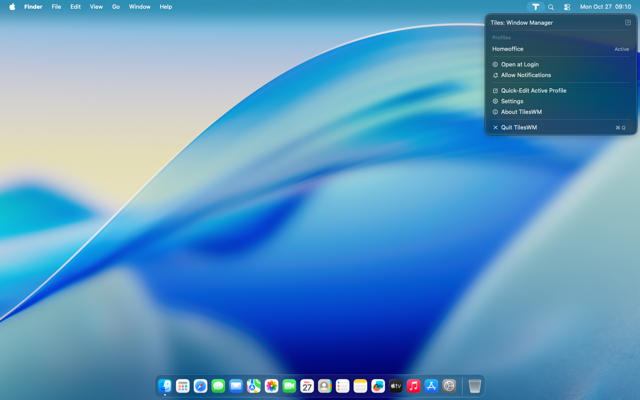
Autostart notification prompt
Step 1

Launch at login

Click "Open at login" and watch the notification appear. That's it, you're done. TilesWM will be ready every time you sign in.
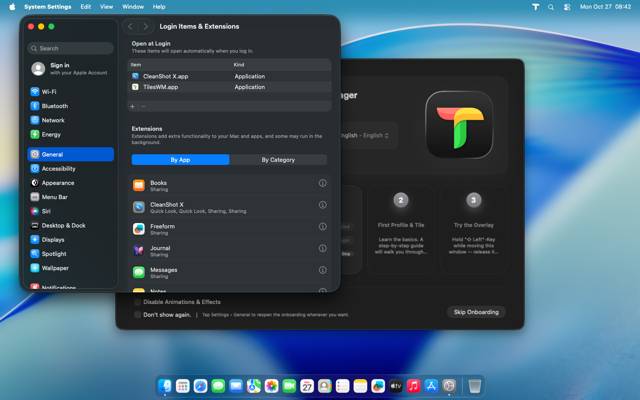
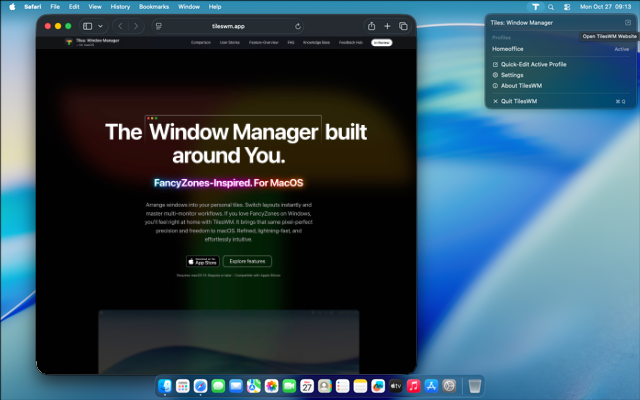
System Settings confirming TilesWM in login items
Step 2

See it in action

You don't need to, but if curiosity strikes, click the notification to see TilesWM listed successfully in your login items.

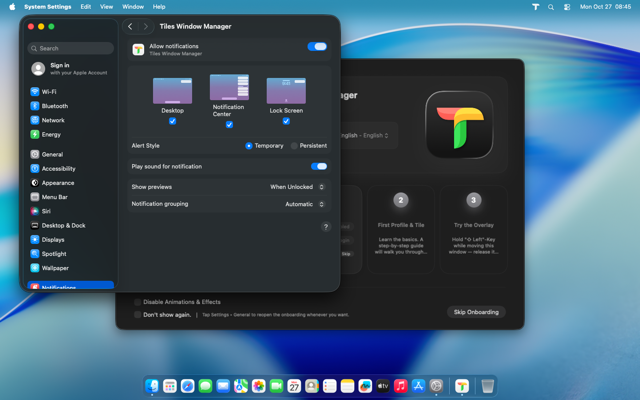
0.4 Notifications (Optional but Suggested)

Stay informed when layouts change

Notification permission request
Step 1

Stay informed

Click "Allow notifications" and the system prompt appears. Notifications keep you in the loop when layouts change or permissions need attention.
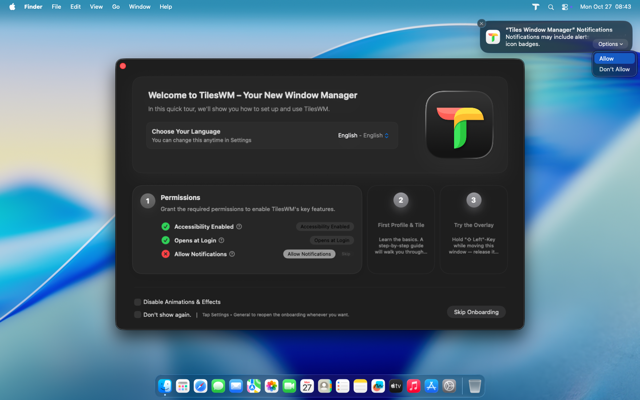
Allowing notifications in system prompt
Step 2

Grant permission

Hover to reveal the options, then click "Allow." Done.
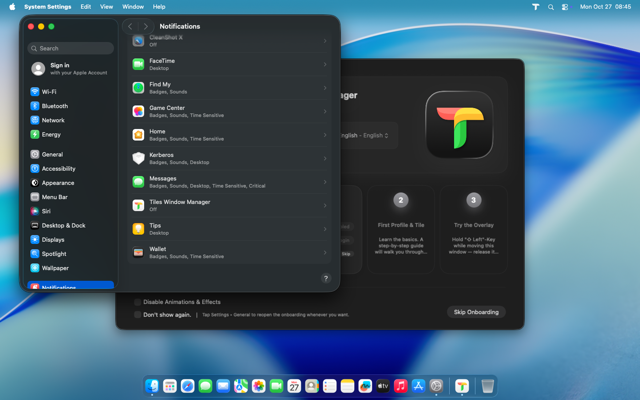
System Settings notifications list
Troubleshooting

Missed the prompt?

No worries. Click "Allow Notifications" again. System Settings opens automatically. Scroll down until you find TilesWM.

TilesWM notification settings detail view
Troubleshooting

Enable manually

Open the TilesWM entry and toggle notifications on. Simple fix.

Notification setup completed
Step 3

Notifications ready

Notification setup complete. TilesWM can now keep you updated with helpful, non-intrusive alerts.

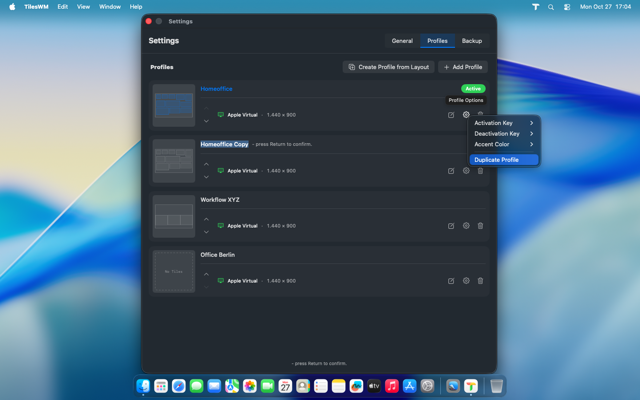
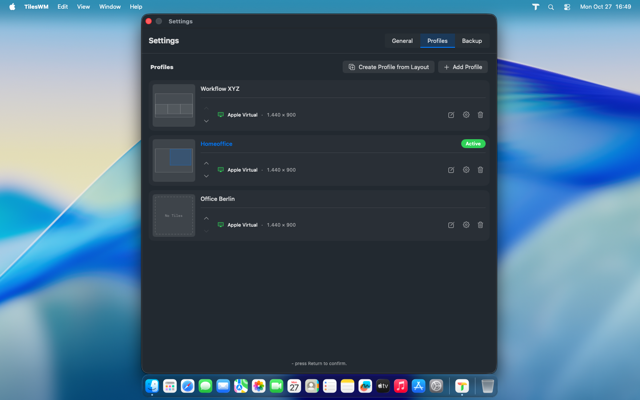
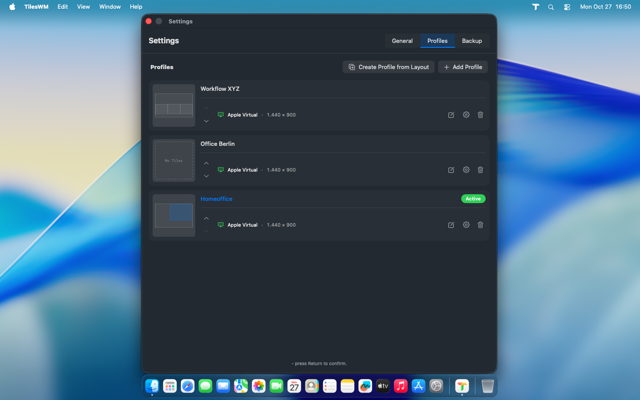
0.5 Your First Profile

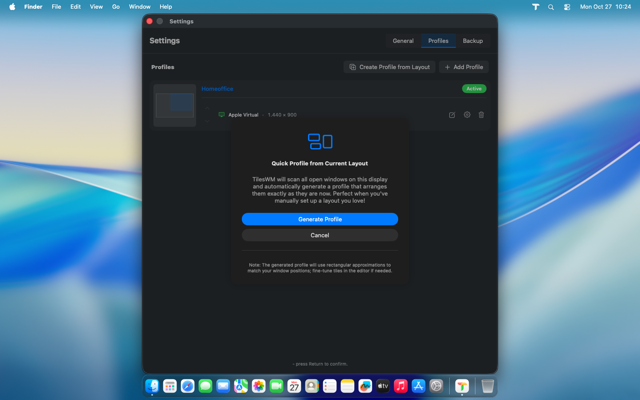
Create a custom window layout tailored to how you work

Onboarding guiding to profile creation
Step 1

Time to create

The onboarding guides you forward. Click "Open Profiles" to begin designing your first layout.
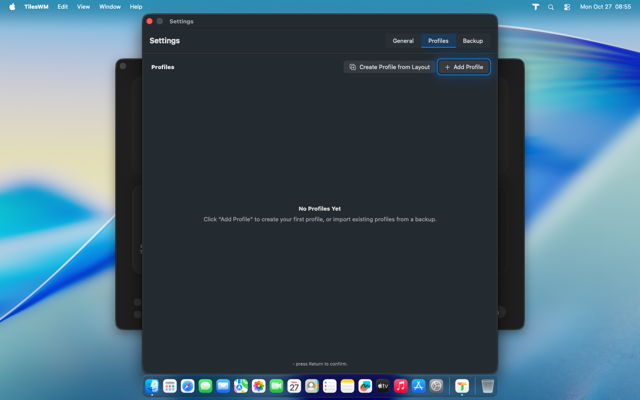
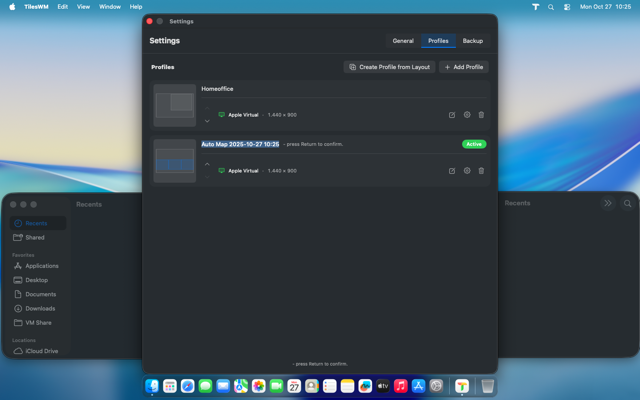
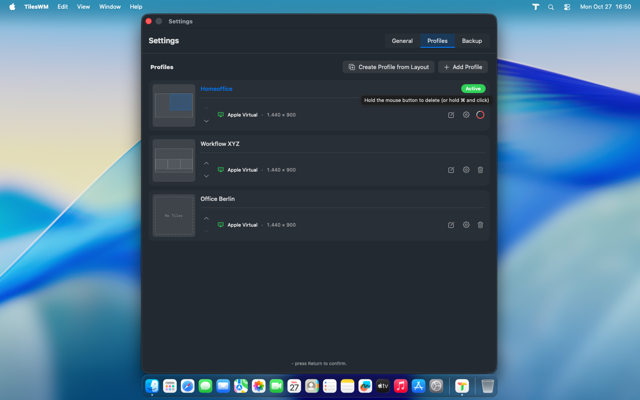
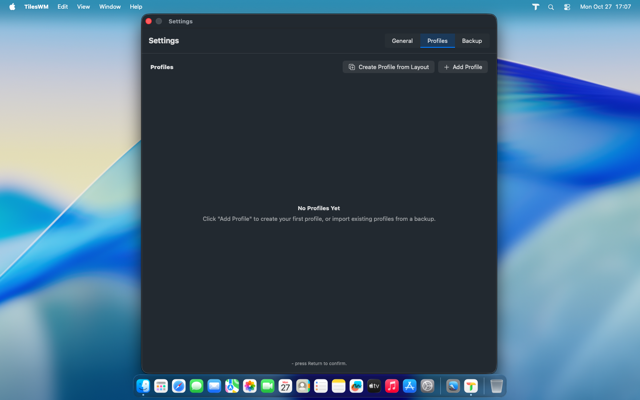
Add profile button highlighted
Step 2

Add your profile

Follow the guidance. Click "Add Profile" to start with a blank canvas.
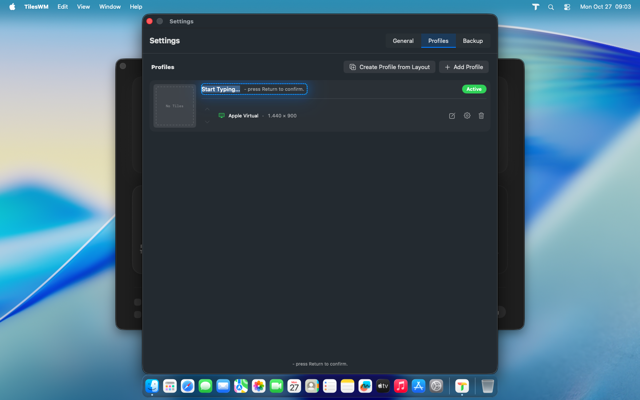
Naming a new profile
Step 3

Name it something

Type a name for your profile. Press Enter or click away when you're satisfied. Hint: A double-click lets you rename it later.
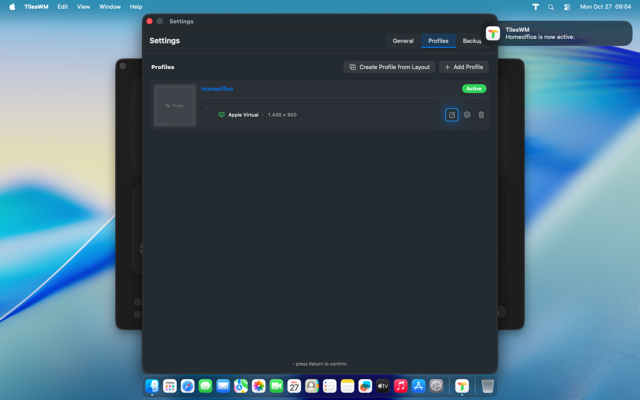
Opening the profile editor
Step 4

Enter the editor

As the onboarding guides, tap to enter the profile editor for your newly created profile.

Drawing the first tile
Step 5

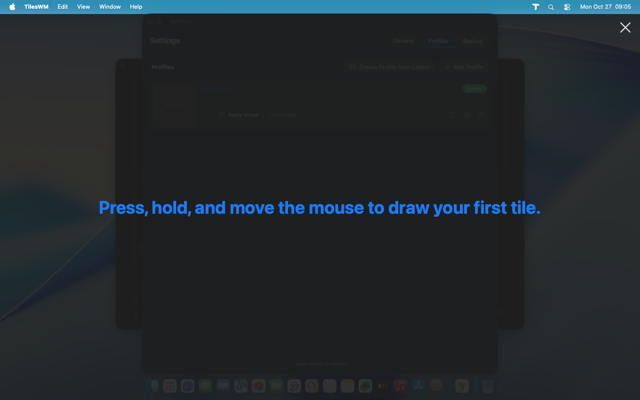
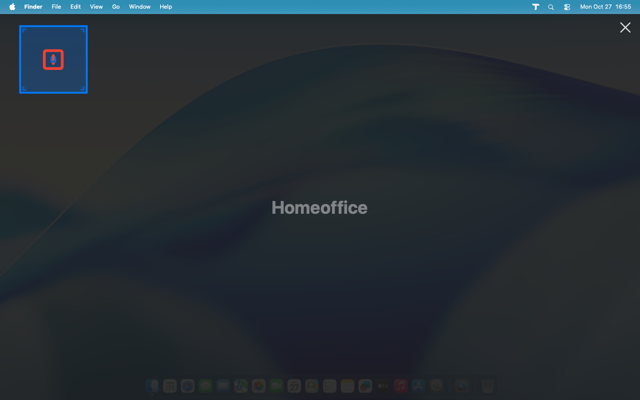
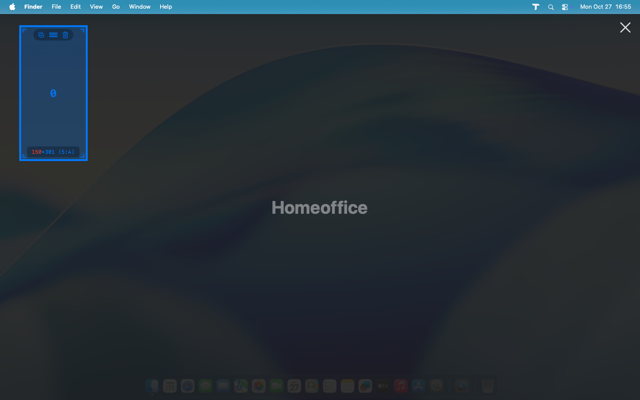
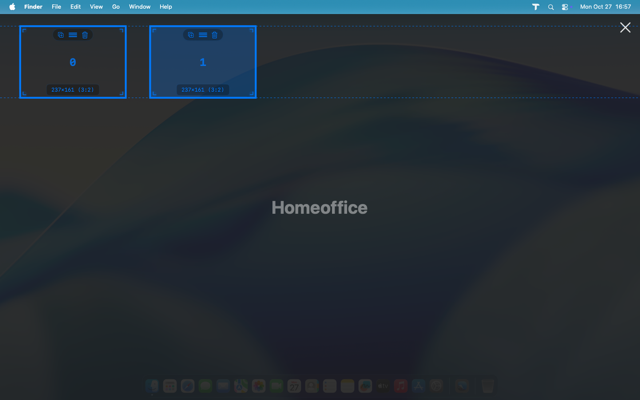
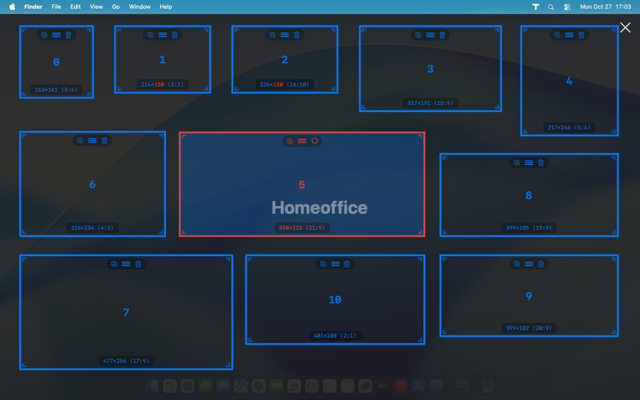
Draw your first tile

Hold your primary mouse button, drag across the canvas, and release.
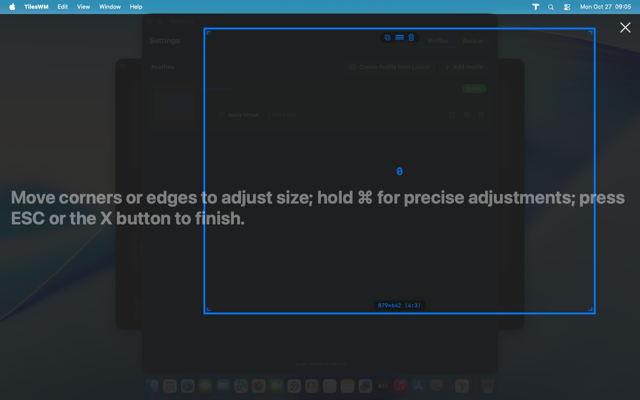
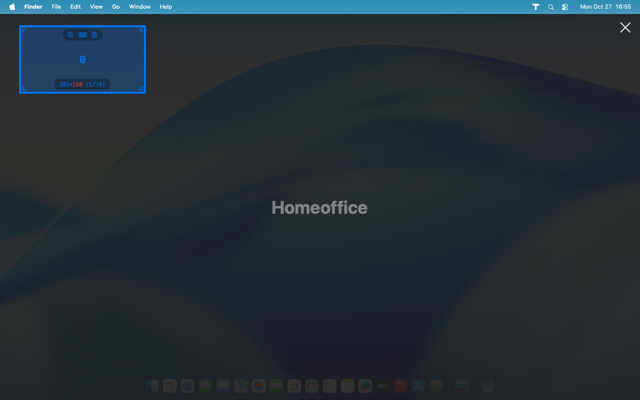
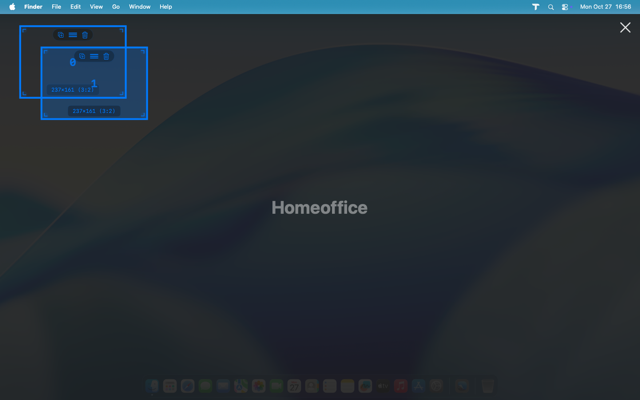
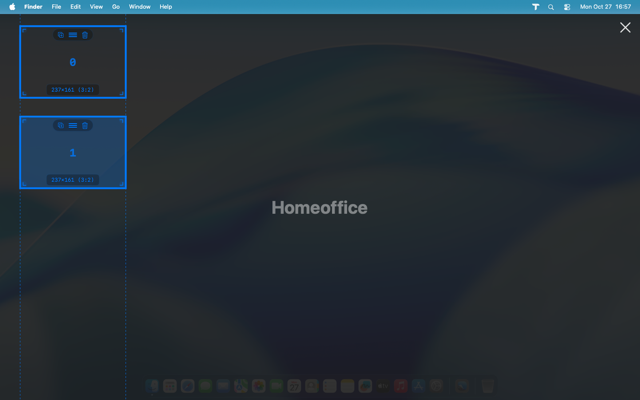
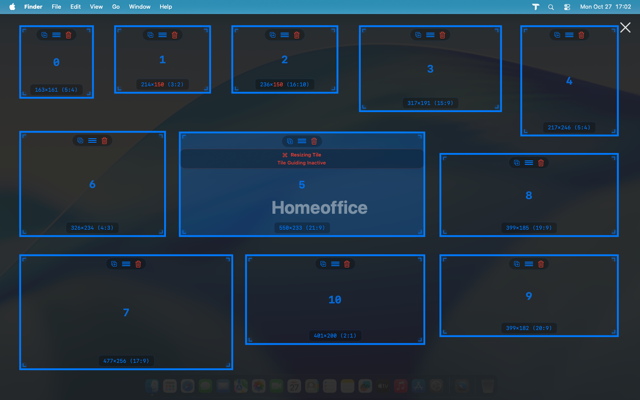
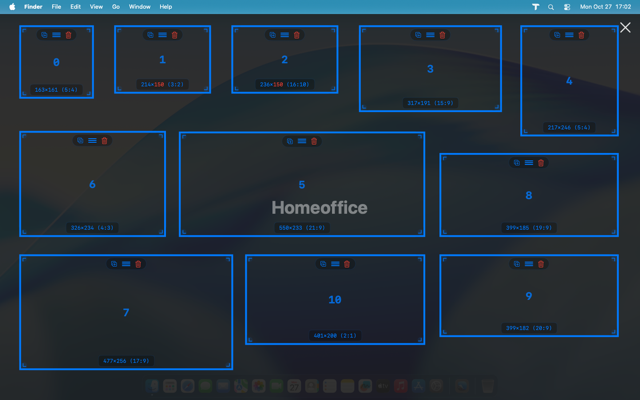
Resizing a tile in the editor
Step 6

Refine it

Try resizing. Drag the edges until it feels right. When you're ready, press Escape or click the X in the top-right corner. Your first profile is complete.
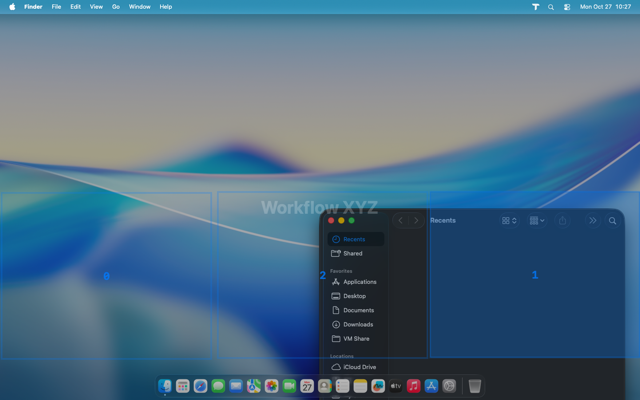
0.6 Using TilesWM

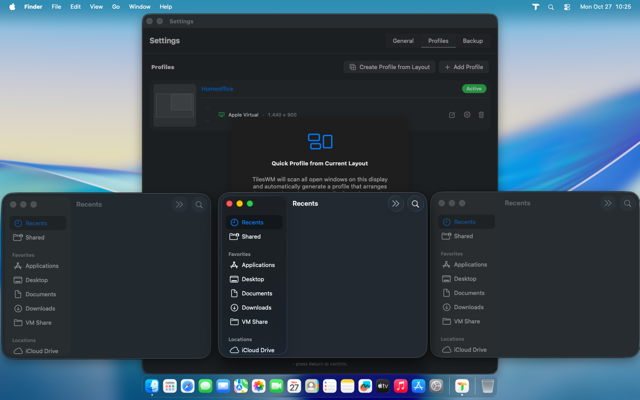
Experience the magic—snap windows into your custom layout
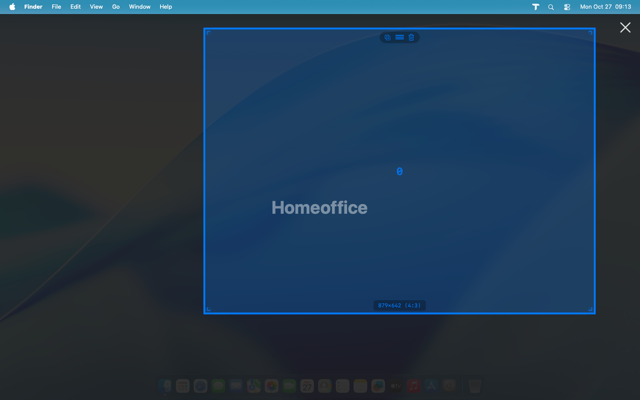
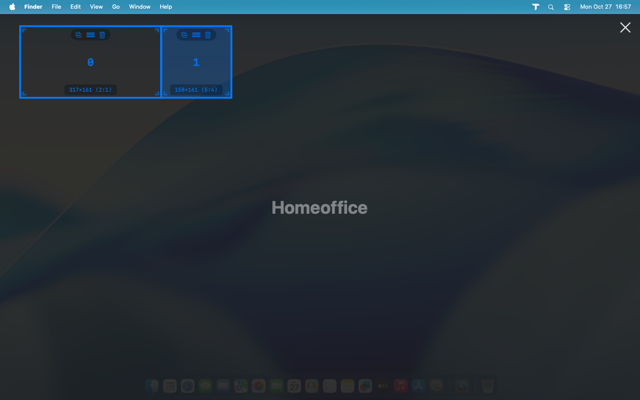
Guidance to activate TilesWM by dragging a window
Step 1

Time to try it out!

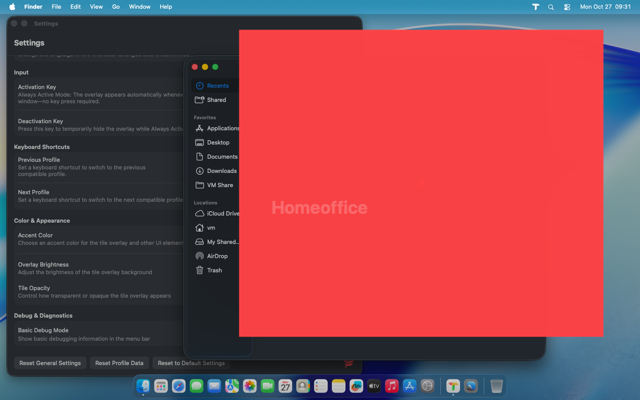
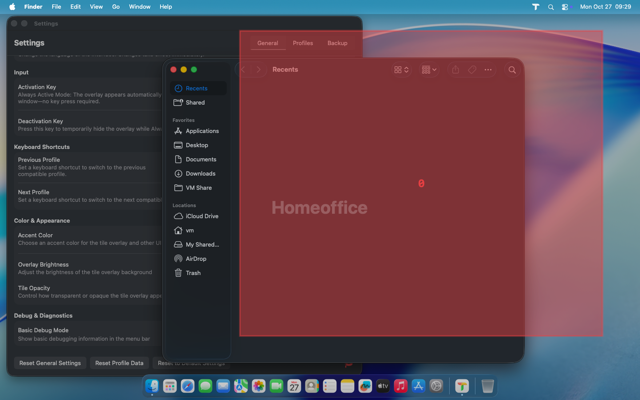
With your profile active, the onboarding guides you one more time. Drag the onboarding window itself to see TilesWM in action.

Holding Shift while dragging a window
Step 2

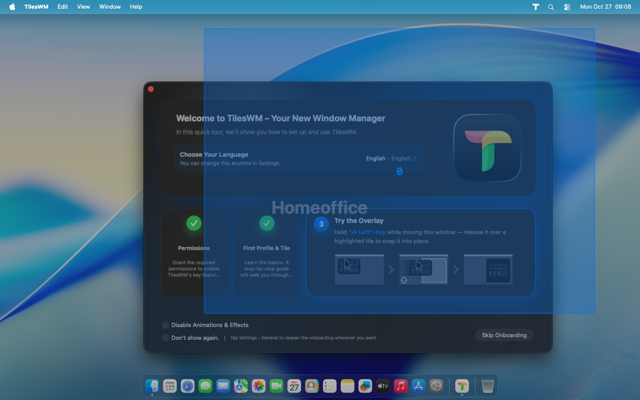
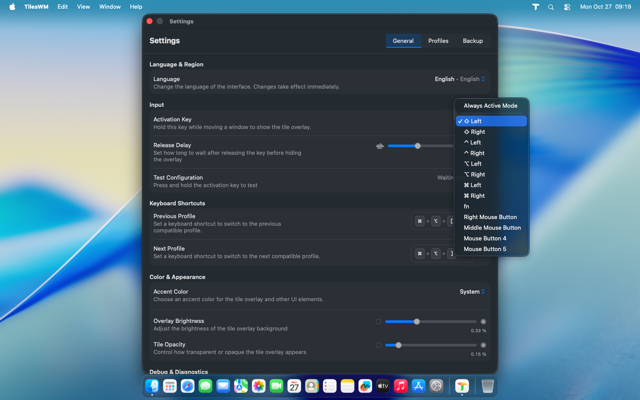
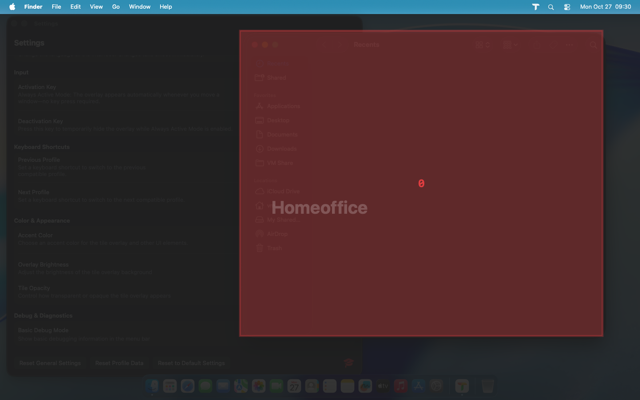
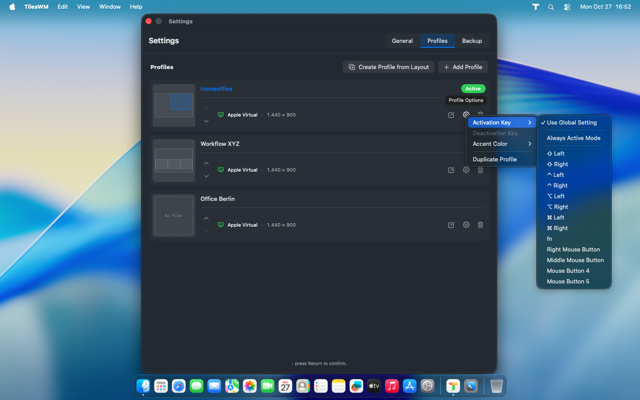
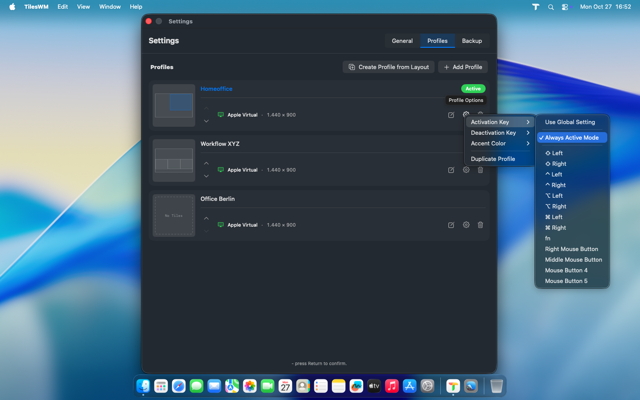
Hold your activation key

As the settings haven't been changed yet, press and hold Shift while you drag. The overlay appears, showing your tiles.
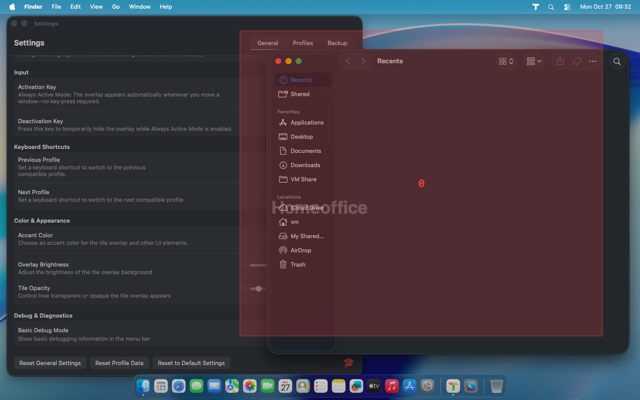
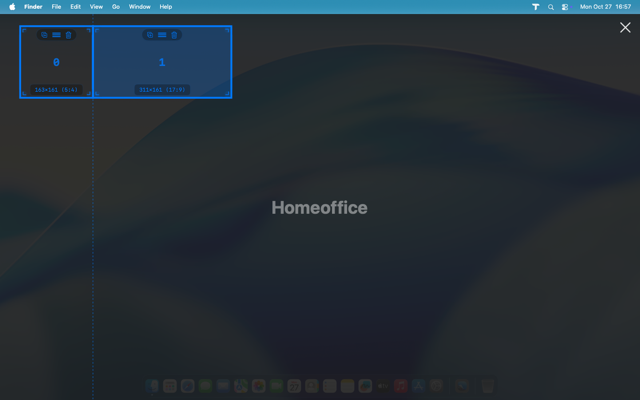
Window successfully snapped to a tile
Step 3

Success

Release over a highlighted tile and watch your window snap perfectly into place. That's TilesWM. That's the moment everything clicks.

Back to top
Context Menu

Everything within reach

Your command center lives in the menu bar. Quick edits, status checks, and settings—all one click away.

Context menu in its regular state
Overview

The Context Menu

After completing onboarding and granting all permissions, this is the screen you’ll see first. Beyond instantly switching between your profiles, a whole suite of features awaits discovery.

TilesWM website link in context menu
Quick Access

Visit the product page

Tap the icon next to TilesWM to open its web portal—your central spot for updates, news, an extensive FAQ & Knowledge Base, plus a Feedback Hub for any help you need.

Context menu showing missing autostart and notifications
Status Awareness

Know what's missing

If Autostart or Notifications aren't enabled, TilesWM tells you directly. You can trigger the request prompts right from here to enable them with ease.

Context menu when accessibility permissions are revoked
Permission Status

When permissions are revoked

If Accessibility permissions get revoked, TilesWM is unable to operate. The menu makes it crystal clear and offers quick access to fix it.

Quick edit option in context menu
Shortcuts

Quick edit your active profile

Opens the editor for your currently active profile instantly, no need to navigate through Settings → Profiles → Editor. It's a shortcut that saves time.

About dialog showing version and links
Information

Check version and updates

The About dialog shows version notes and provides links to the product page and Feedback Hub. Stay informed, stay connected.

Settings option highlighted in context menu
Navigation

Open Settings

Click Settings to access General Settings, Profile Settings, Backup and Restore options, and Debug Mode when enabled.

Back to top
Settings

Make it yours

From language selection to color palettes, every detail can be tuned. TilesWM adapts to the way you work, not the other way around.

Language selection in settings
Language & Region

Switch languages anytime

Change your locale whenever inspiration strikes. TilesWM speaks your language, literally.

Activation key selection interface
Input

Choose your activation key

Default is Left Shift, but you're in control. Pick the key that feels natural to you, or even go keyless with Always Active-Mode.

Overlay delay adjustment slider
Input

Fine-tune the overlay delay

Adjust how long the overlay stays visible after you press your activation key. The green indicator shows the timing in real-time. If you often miss the tile highlight, increase the window.

Always Active Mode toggle
Input

Try Always Active Mode

No need to hold a key, the overlay appears automatically when dragging any window. But when you want to move windows freely, choose a deactivation key to hide the overlay temporarily.

Keyboard shortcuts list
Keyboard Shortcuts

Review your shortcuts

See all your keyboard shortcuts at a glance. Use the trash can icon to disable any shortcut you don't need.

Editing a keyboard shortcut
Keyboard Shortcuts

Customize your Hotkeys

Click the pencil to enter edit mode. TilesWM waits for your key combination. Press Escape to cancel if you change your mind.

Shortcut successfully updated
Keyboard Shortcuts

Instant activation

Once set, your new shortcut works immediately. No restart required.

Overlay brightness at 90 percent
2.4 Color and Appearance

Dial up the drama

Crank the overlay brightness to 90% for a bold, dimmed desktop that puts full focus on your tiles.

Overlay brightness at 10 percent
Color and Appearance

Keep it subtle

Lower it to 10% for a nearly invisible overlay. The tile highlights still guide you without overwhelming your view.

Tile opacity at 90 percent
Color and Appearance

Bold tile visibility

Bump tile opacity to 90% and tiles become almost opaque—highly visible, unmissable.

Tile opacity at 10 percent
Color and Appearance

Gentle guidance

At 10%, tiles are almost invisible but present enough to place your windows with precision.

Accent color applied to tiles
Color and Appearance

Express yourself with color

The accent color applies to the UI and the tile highlights, helping you identify profiles at a glance.

Debug mode toggle in settings
Debug Mode

Enable basic debugging

Usually only needed when something doesn't work as expected. Activating this adds the Debug tab to the top-right corner.

Advanced debug mode restart prompt
Debug Mode

Advanced debugging requires restart

Enabling Advanced Debug mode prompts you to restart. It works without restarting, but for capturing initialization issues, a restart is recommended.

Reset general settings confirmation dialog
Reset General Settings

It became messy?

Resetting only affects the General tab settings—nothing more, nothing less. A 3-second grace period prevents accidental clicks. You may want to make a backup first.

Reset button ready to proceed
Reset General Settings

3-second grace period

After 3 seconds, the button activates. You can proceed or abort.

Reset complete confirmation
Reset General Settings

Back to normal

Your general settings return to their default state. Fresh start.

Reset profiles confirmation dialog
Reset Profile Settings

Profiles need a cleanup?

This deletes all your profiles. The same 3-second grace period applies. Make a backup if these layouts matter.

Profile reset button ready
Reset Profile Settings

Wait 3 seconds...

When ready, the button activates. Take a breath, then decide.

Profiles reset complete
Reset Profile Settings

Profiles cleared

All your profiles are gone. Time to rebuild or restore from backup.

Reset everything confirmation dialog
Reset Default Settings

The nuclear option

This wipes everything—settings, profiles, the whole database. Make absolutely sure you have a backup.

Reset everything button ready
Reset Default Settings

Last chance

The 3-second grace period passes. Click to wipe everything clean.

Complete reset finished, onboarding appears
Reset Default Settings

Factory clean

The database is wiped. TilesWM returns to the onboarding screen. You're starting fresh.

Teaching icon help menu
The Graduation-Cap

Help & Support

The teaching icon gives you instant access to FAQs, the Feedback Hub, and the onboarding guide. Help is always one click away.

Back to top
Profiles

Your layouts, your way

Create, edit, organize, and perfect your window layouts. Profiles give you the power to switch contexts instantly and work with purpose.

Add Profile button highlighted
Creating Profiles

Add a new profile

Just like in onboarding, click "Add Profile" to start building a new layout from scratch.

Naming a new profile
Creating Profiles

Give it a name

Type a descriptive name. Hit Enter or click away. Done. (You can always rename it later by double-clicking the name.)

Auto mapping modal instructions
Auto Mapping

Let TilesWM map your windows

Click "Create Profile from Layout." The modal asks you to arrange your windows the way you want your profile to be. Ignore the TilesWM window and modal, they don't count.

Windows arranged for auto mapping
Auto Mapping

Arrange your windows

For example, three windows at the bottom. Position them exactly how you envision your tiles.

Naming the auto-mapped profile
Auto Mapping

Name your creation

Once you hit "Create Profile," TilesWM analyzes your window positions and generates tiles. Give it a name.

Testing the auto-mapped profile
Auto Mapping

See the result

Make sure the profile is active. You'll see the new layout based on your window arrangement.

Windows snapping to auto-mapped tiles
Auto Mapping

Magic in action

Windows snap right in. Remember: every window fits in any tile, not just the ones you used during creation.

Invalid tile dimensions warning
Profile Editor

Mind the minimums

Tiles can be too small. This example shows a tile that's neither tall enough nor wide enough to be usable.

Tile with insufficient height
Profile Editor

Too short

Insufficient height. Adjust until TilesWM is happy.

Tile with insufficient width
Profile Editor

Too narrow

Insufficient width. Make it wider.

Tile showing aspect ratio information
Profile Editor

Know your dimensions

Each tile displays its exact dimensions and aspect ratio at the bottom. Precision at a glance.

Duplicating a tile
Profile Editor

Duplicate with ease

Found the perfect tile? Duplicate it and adjust. Saves time.

Dual resize handles between tiles
Profile Editor

Resize two at once

When two tiles touch, you can resize both simultaneously by dragging their shared edge.

Dual resize in both directions
Profile Editor

Works both ways

Horizontal or vertical—dual resize adapts to the tiles you're working with.

Horizontal alignment guide
Profile Editor

Stay aligned horizontally

As you arrange tiles, guidelines appear with magnetic snapping to help you position everything perfectly along the X axis.

Vertical alignment guide
Profile Editor

Stay aligned vertically

The guide works for the Y axis too. Precision without effort.

Precision mode by holding ⌘
Profile Editor

Go granular with ⌘

Hold ⌘ for pixel-perfect positioning. No snapping, no dual resize—just pure precision.

Instant delete with ⌘ held
Profile Editor

Instant delete, use carefully

While holding ⌘, you can also instantly delete tiles. No confirmation. Be careful with this power.

Hold to delete confirmation
Profile Editor

Hold to delete safely

Without ⌘, you need to hold the delete button (trashcan-icon). Prevents accidents.

Per-profile activation key setting
Profile Options

Custom activation keys

Assign a dedicated activation key for each profile. Overrides the global setting when this profile is active.

Deactivation key for Always Active Mode
Profile Options

Deactivation in Always Active Mode

Using Always Active Mode? The deactivation key setting becomes available here too, of course.

Per-profile accent color picker
Profile Options

Color-code your profiles

Each profile can have its own accent color, overriding the global setting. Makes switching profiles visually intuitive.

Accent color applied to profile
Profile Options

See the difference

The accent color applies to highlights, helping you identify which profile is active at a glance.

Duplicate profile option
Profile Options

Experiment with duplicates

Duplicate a profile to create variations. Maybe give it a new name and tweak it without touching the original.

Hold to delete a profile
Deleting Profiles

Hold to delete

Just like in the editor—hold the button until the profile is gone. No accidental deletions.

Instant delete profile with ⌘
Deleting Profiles

Quick delete with ⌘

Hold ⌘ and click to instantly delete. Use with caution, mate.

Profile order example, default position
Sorting Profiles

Organize your way

The order of profiles is mirrored in the system context menu. Use the arrows to arrange them as you like. Position example 1/3.

Profile moved one position down
Sorting Profiles

One step down

Press the down arrow once. Position example 2/3.

Profile moved two positions down
Sorting Profiles

And another

Press again. Position example 3/3. Your order, your rules.

Back to top
Backup & Restore

Protect what you've built

Your profiles and settings represent hours of fine-tuning. Back them up before major changes, restore them on a new Mac, or share them with teammates. It's all seamless.

Backup view overview
Overview

Your backup command center

The overview provides Backup and Restore functions and shows the actual contents of your backup, securely saved on your machine.

Create backup file dialog
Creating Backups

Choose your destination

Click the Backup button and a file dialog opens. Choose where to save your backup—Desktop, Documents, external drive, wherever feels safe.

Backup creation success message
Creating Backups

Confirmation in seconds

If the backup saves correctly, TilesWM tells you immediately. Peace of mind, delivered.

Profile view before restore
Restoring Backups

Starting fresh

Imagine you just installed TilesWM on a new Mac or wiped your profiles. This is what you see—empty, ready for restoration.

File dialog for selecting backup file
Restoring Backups

Select your backup file

Click Restore and the file dialog appears. Find your backup file and select it.

Profiles successfully restored
Restoring Backups

Everything's back

If your backup is valid, everything just got restored—profiles, settings, shortcuts. Like you never left.

Back to top
Debug

When things go sideways

Sometimes the app misbehaves. Or maybe you're just curious about what's happening under the hood. Debug Mode gives you visibility and control.

Debug overview showing key values
Debug Overview

Behind the curtain

The base Debug overview provides insights into all the key values TilesWM operates with—activation keys, window positions, timers, delays, database location. Everything that powers the app, laid bare.

Advanced debug mode with runtime log
Advanced Debugging

Watch it live

Turn on Advanced Debugging and the log shows real-time information about the app—background events, actions, window resizes, everything. If you encounter issues, export this log for the Feedback Hub so bugs can be properly fixed.

Back to top

Ready to transform your workspace?

Coming soon. Order for your desktop is on the way.